 Tải Xuống

Trang chủ > Cơ Sở Kiến Thức > How to turn on the System Restore of Windows 10
June 9, 2020
How to turn on the System Restore of Windows 10
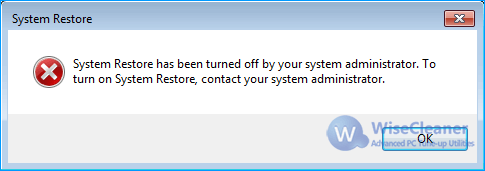
when you try to create a system restore point, you may receive an error message, it says "System Restore has been turned off by your system administrator. To turn on System Restore, contact your system administrator." You must be thinking, I am the administrator, why do I still receive this error?
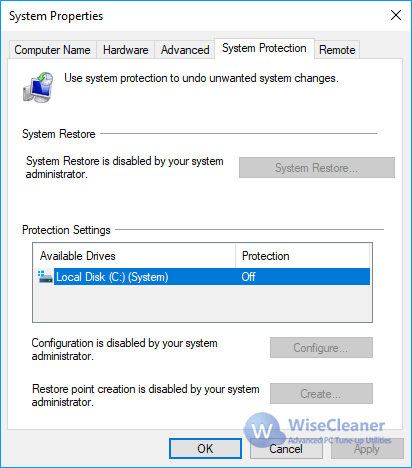
If you try to reactivate the system restore function according to some solutions on the Internet, you may encounter a new problem the buttons in System Protection tab of the System Properties was gray (unavailable).
How to fix the problem that the System Restore has been turned off by your system administrator?
How to solve the problem that the Configure button in System Protection is grey?
Actually, the above 2 issues are essentially a problem and the solution is the same. Please follow the steps below.
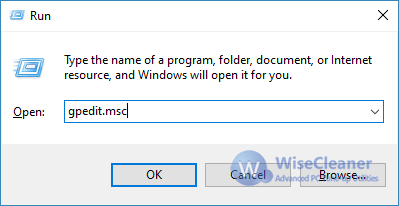
1. Press Win+R together to open the Run window.
2. Type the following command in the Run box and click OK.
gpedit.msc
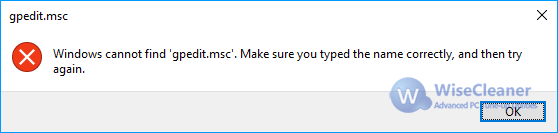
This command opens the Local Group Policy Editor. However, if your OS is Windows 10 Home Edition, the Local Group Policy Editor is unavailable, and you will receive the error message "Windows cannot find gpedit.msc. Make sure you typed the name correctly, and then try again."
Please refer to this page to learn >>> How to enable Local Group Policy Editor in Windows 10 Home.
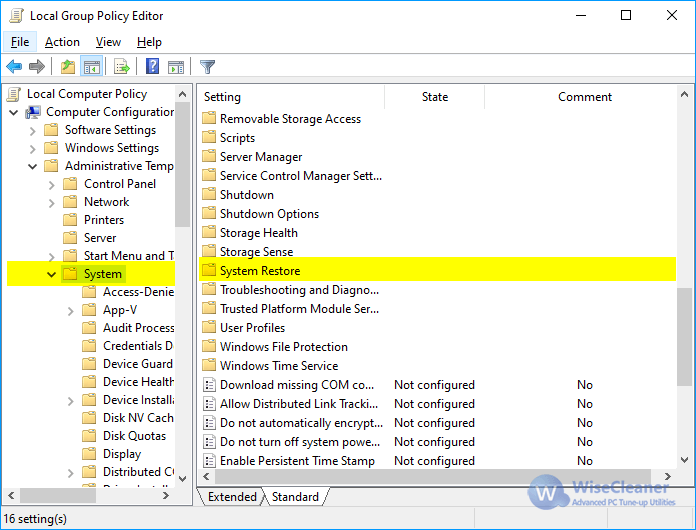
3. In the left panel of the Local Group Policy Editor, navigate to Computer Configuration - Administrative Templates – System - System Restore
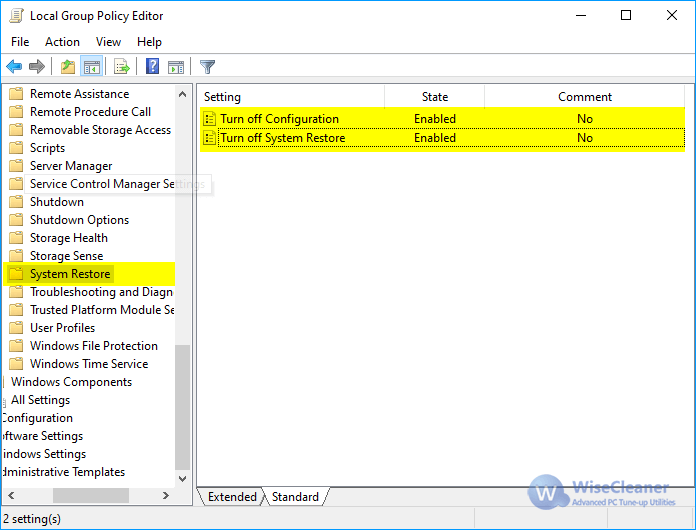
4. In the right panel, double-click on Turn off System Restore
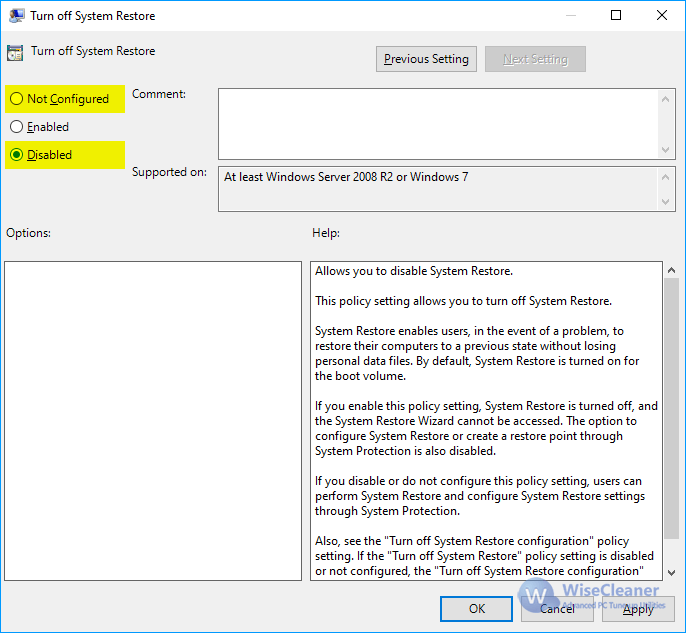
5. Select Disabled and click OK to save changes.
6. If the state of the option Turn off Configuration is Enabled, please double-click on it. Then select Disabled and click OK to save changes.
Now, you could open the System Protection successfully and the Configure button is available. Please follow the steps below to enable System Restore.
1. Press Win+R together to open the Run window
2. Type the following command in the Run box and press Enter.
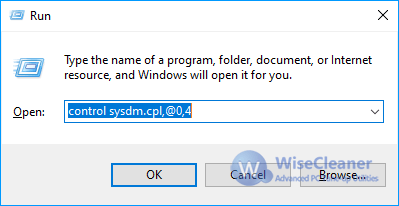
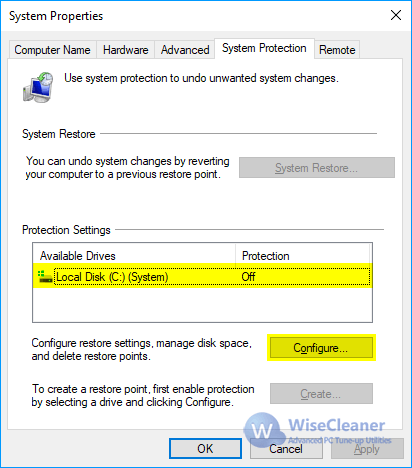
control sysdm.cpl,@0,4
3. Select the system drive C in the Protection Settings and click the Configure button.
4. Choose the option Turn on system protection
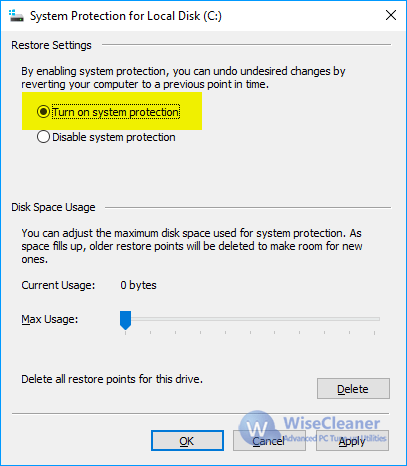
5. You can adjust the maximum disk space by dragging the scroll bar for the system restore point. Or let the system manage it.
6. Click OK to save changes.
If you try to reactivate the system restore function according to some solutions on the Internet, you may encounter a new problem the buttons in System Protection tab of the System Properties was gray (unavailable).
How to fix the problem that the System Restore has been turned off by your system administrator?
How to solve the problem that the Configure button in System Protection is grey?
Actually, the above 2 issues are essentially a problem and the solution is the same. Please follow the steps below.
1. Press Win+R together to open the Run window.
2. Type the following command in the Run box and click OK.
gpedit.msc
This command opens the Local Group Policy Editor. However, if your OS is Windows 10 Home Edition, the Local Group Policy Editor is unavailable, and you will receive the error message "Windows cannot find gpedit.msc. Make sure you typed the name correctly, and then try again."
Please refer to this page to learn >>> How to enable Local Group Policy Editor in Windows 10 Home.
3. In the left panel of the Local Group Policy Editor, navigate to Computer Configuration - Administrative Templates – System - System Restore
4. In the right panel, double-click on Turn off System Restore
5. Select Disabled and click OK to save changes.
6. If the state of the option Turn off Configuration is Enabled, please double-click on it. Then select Disabled and click OK to save changes.
Now, you could open the System Protection successfully and the Configure button is available. Please follow the steps below to enable System Restore.
1. Press Win+R together to open the Run window
2. Type the following command in the Run box and press Enter.
control sysdm.cpl,@0,4
3. Select the system drive C in the Protection Settings and click the Configure button.
4. Choose the option Turn on system protection
5. You can adjust the maximum disk space by dragging the scroll bar for the system restore point. Or let the system manage it.
6. Click OK to save changes.